Searching new photographic techniques I recently ran into technique called HDR. Unfortunately I didn't found much records concerning HDR on internet. That's why I contacted few photographers which already had great HDR photos and it was obvious they knew this technique very well. Soon I get desired answers and find out, that such kind of photography is considerably simple and at the same time quite fascinating.
There is no great wisdom concerning HDR technique. Actually taking photography suitable for HDR is very simple. Processing in computer demands some extra time.
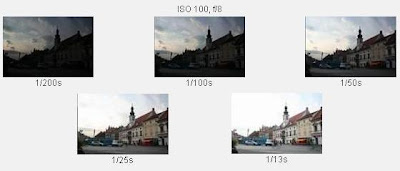
Photo camera can't show extremely contrast pictures. If some parts of the scene contain a lot of light and some almost no light, we can find compromise with HDR technique. On High Dynamic Range images there are no bright and no to dark parts. There is almost impossible to take such picture in one step. Photographic sensors are not so adjustable jet. That’s why we take at least five photos. God tripod is very useful. When appropriate shot is chosen, we set camera's perfect time and aperture. Beside this “perfect” photo, we also make two or three differently under exposed and over exposed photos. I usually make 5-7 photos.
 Most times for HDR I use wide angle lenses. With my Canon EOS 350D I've got Canon 18-55 EF-S lens. Probably with better lens, my HDR-s would be catchier. Once I will probably afford Sigma 10-20mm f/4-5,6 EX DC HSM.
When we took 5-7 differently exposed photos, we can continue our work on personal computer. Thou I use Photo Shop CS2, I will describe this procedure. There is several other photo – programs. Sometimes I also use Photomatix Pro.
We open PhotoShop CS2. Click on drop menu: File › Automate › Merge to HDR…
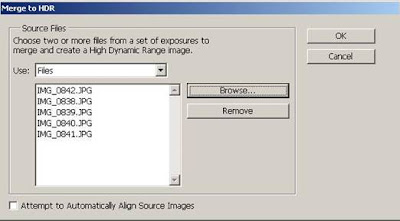 We pick photos we want to merge in HDR, and then click OK. Your probably not so fast computer will take some time to analyze and merge all photos.
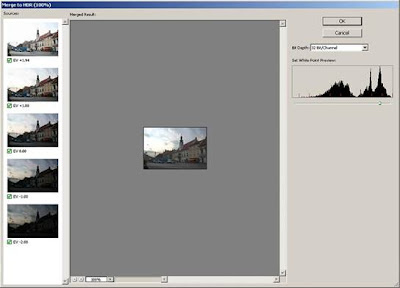 Window above it shows merged picture. On the left side, you can see thumbnails of photos used for this HDR. You can select or deselect photos you wish to include in further treatment. I pick them by feeling. Try some combinations, and pick the best one. With slider you can adjust intensity of dynamic range. We save file in 32 bit mode. The file will get extension *.PBM (Portable Bit Map). For better representation on our screen or printer we must convert 32 bit photo to 16 or 8 bit photo. For that, we use Image › Mode › 16 Bits/Channel… It appears window below:
There is no great wisdom concerning HDR technique. Actually taking photography suitable for HDR is very simple. Processing in computer demands some extra time.
Photo camera can't show extremely contrast pictures. If some parts of the scene contain a lot of light and some almost no light, we can find compromise with HDR technique. On High Dynamic Range images there are no bright and no to dark parts. There is almost impossible to take such picture in one step. Photographic sensors are not so adjustable jet. That’s why we take at least five photos. God tripod is very useful. When appropriate shot is chosen, we set camera's perfect time and aperture. Beside this “perfect” photo, we also make two or three differently under exposed and over exposed photos. I usually make 5-7 photos.
 Most times for HDR I use wide angle lenses. With my Canon EOS 350D I've got Canon 18-55 EF-S lens. Probably with better lens, my HDR-s would be catchier. Once I will probably afford Sigma 10-20mm f/4-5,6 EX DC HSM.
When we took 5-7 differently exposed photos, we can continue our work on personal computer. Thou I use Photo Shop CS2, I will describe this procedure. There is several other photo – programs. Sometimes I also use Photomatix Pro.
We open PhotoShop CS2. Click on drop menu: File › Automate › Merge to HDR…
 We pick photos we want to merge in HDR, and then click OK. Your probably not so fast computer will take some time to analyze and merge all photos.
 Window above it shows merged picture. On the left side, you can see thumbnails of photos used for this HDR. You can select or deselect photos you wish to include in further treatment. I pick them by feeling. Try some combinations, and pick the best one. With slider you can adjust intensity of dynamic range. We save file in 32 bit mode. The file will get extension *.PBM (Portable Bit Map). For better representation on our screen or printer we must convert 32 bit photo to 16 or 8 bit photo. For that, we use Image › Mode › 16 Bits/Channel… It appears window below:
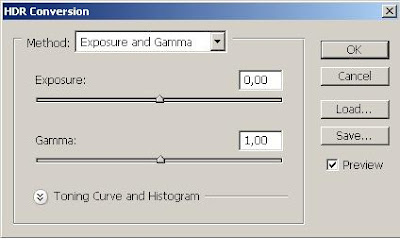 If you press F1 (Help in Photo Shop CS2), you find out, you heave four different choices to convert 32 bit photo in16 bit:
Exposure and Gamma Lets you manually adjust the brightness and contrast of the HDR image.
Highlight Compression Compresses the highlight values in the HDR image so they fall within the luminance values range of the 8- or 16-bits-per-channel image file. No further adjustments are necessary; this method is automatic. Click OK to convert the 32-bits-per-channel image.
Equalize Histogram Compresses the dynamic range of the HDR image while trying to preserve some contrast. No further adjustments are necessary; this method is automatic. Click OK to convert the 32-bits-per-channel image.
Local Adaptation Adjusts the tonality in the HDR image by calculating the amount of correction necessary for local brightness regions throughout the image.
For me, best choice is »Local Adaptation«. With click on Toning Curve and Histogram, you can totally adapt photo by your taste. Mostly we want to rid of to bright or to dark parts on our photo. When we are pleased with our choice, all we heave to do is confirm our settings, and photo is ready.
Some times photo demands some more treatment to become perfect photo. I use some noise reduction. Levels correction. Brightness and contrast. Shadows highlights.
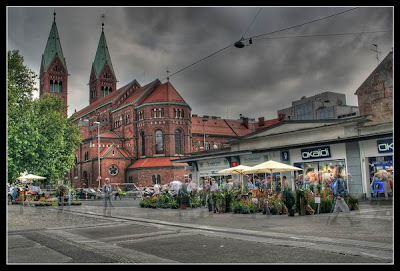
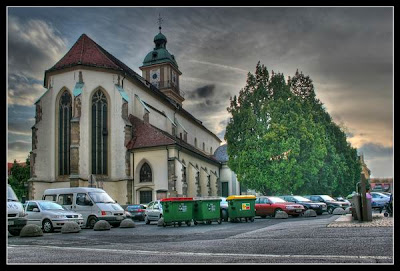
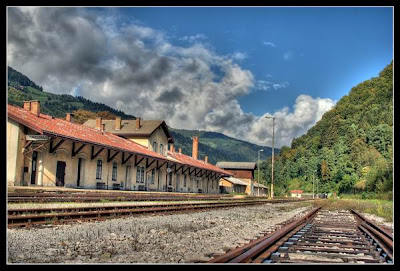
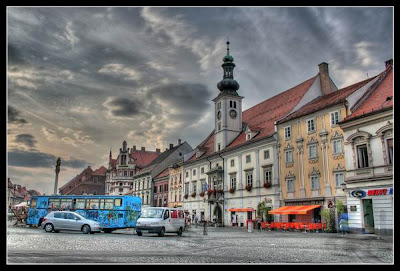
Some final results:
Most of this pictures are taken with Canon EF-S 18-55mm f/3.5-5.6 Lens.
I also use Canon EF 28-105/3.5-4.5 or Canon EF 50/1.8
I just bought Sigma 28-70 f2.8 EX and I think it will be quite suitable for HDR.
